
Are you looking to create a stunning flower collage or mosaic for your project? Look no further! This article will guide you through the step-by-step process of making a beautiful floral artwork that will leave everyone in awe. By following these instructions, you will learn about the materials needed and different techniques to create a masterpiece that showcases the beauty of flowers.
Before we dive into the details, let’s talk about the purpose of this article. Our goal is to provide you with comprehensive guidance on how to make a flower collage or mosaic. Whether you’re a beginner or an experienced artist, this article is designed to help you create stunning floral artwork that will impress and inspire.
So, let’s get started! To make a flower collage or mosaic, you need to gather the right materials and familiarize yourself with the techniques involved. Don’t worry, we’ll walk you through each step, ensuring that you have a clear understanding of the process.
First, let’s discuss the materials you’ll need. To create a flower collage or mosaic, you’ll require a variety of flowers, adhesive, a canvas or base, and additional embellishments. The type of flowers you choose is crucial, as their colors, shapes, and sizes will determine the overall look of your artwork.
Once you have the materials ready, it’s time to dive into the techniques. We’ll cover everything from preparing the flowers by drying and pressing them to arranging them in a visually pleasing way. You’ll also learn how to glue the flowers onto the canvas or base securely. To add that extra touch of beauty, we’ll explore different embellishments and techniques to enhance the overall look of your artwork.
If you’re planning to create a flower mosaic, we’ll guide you through the grouting and sealing process, ensuring a polished and professional finish. And finally, we’ll provide tips on how to properly display and care for your artwork, so it can be enjoyed for years to come.
Now that you have an overview of what to expect, let’s dive into the details of each step. Get ready to embark on a creative journey that will result in a stunning flower collage or mosaic for your project!
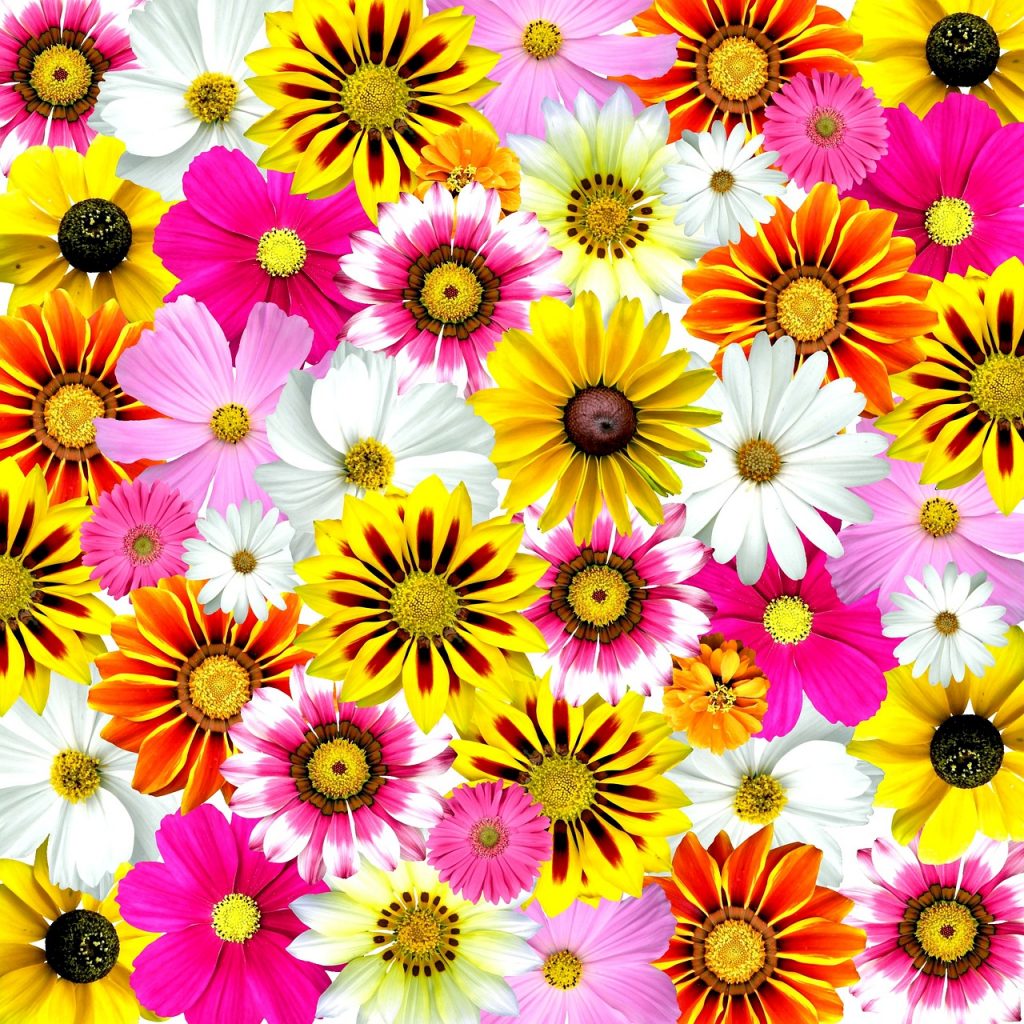
Choosing the Right Flowers
Selecting the right flowers is crucial for a successful collage or mosaic. When creating floral artwork, it’s important to consider the colors, shapes, and sizes of the flowers to ensure a visually appealing and cohesive result.
Here are some tips to help you choose the best flowers for your project:
- Colors: Consider the color palette you want to achieve in your artwork. Choose flowers that complement each other and create a harmonious blend of hues. You can opt for a monochromatic scheme, using different shades of the same color, or go for a vibrant mix of contrasting colors to create a dynamic effect.
- Shapes: Flowers come in various shapes, from delicate petals to bold blooms. Think about the overall composition of your artwork and select flowers with shapes that add interest and variety. Combining different shapes can create a visually captivating collage or mosaic.
- Sizes: Varying the sizes of the flowers adds depth and dimension to your artwork. Choose flowers with different sizes to create a sense of perspective. Larger flowers can serve as focal points, while smaller ones can be used to fill in gaps and add detail.
By carefully selecting flowers that harmonize in terms of color, shape, and size, you can create a visually stunning and cohesive flower collage or mosaic. Experiment with different combinations and let your creativity bloom!
Preparing the Flowers
Preparing the Flowers
Before you begin creating your flower collage or mosaic, it is crucial to properly prepare the flowers. This step ensures that your artwork not only looks beautiful but also lasts for a long time. By drying and pressing the flowers, you can maintain their vibrant colors and shapes, allowing them to retain their natural beauty in your artwork.
Drying the Flowers
To dry the flowers, you can follow a simple process that helps remove moisture while preserving their delicate features. Here’s how:
- Gather the flowers you want to use for your collage or mosaic.
- Remove any excess leaves or stems from the flowers.
- Tie the flowers together in small bundles using string or rubber bands.
- Hang the bundles upside down in a well-ventilated area away from direct sunlight.
- Leave the flowers to dry for about two to three weeks, or until they are completely dry and crisp to the touch.
Pressing the Flowers
Pressing the flowers helps flatten them and preserve their natural shape. Here’s a simple method to press your flowers:
- Place the dried flowers between two sheets of absorbent paper, such as blotting paper or newspaper.
- Put the paper with the flowers inside a heavy book or flower press.
- Apply pressure to the book or press by adding additional weight on top.
- Leave the flowers pressed for about two to three weeks, allowing them to fully dry and flatten.
Once your flowers are dried and pressed, you can proceed to arrange and create your stunning flower collage or mosaic. Remember to handle the dried flowers with care to prevent any damage or breakage.
Arranging the Flowers
Arranging the flowers is an essential part of creating a stunning flower collage or mosaic. This step allows you to showcase the beauty and colors of the flowers in a visually pleasing way. When arranging the flowers, it is important to consider color combinations and focal points to create a harmonious and balanced composition.
There are various techniques and tips you can explore to arrange the flowers in a visually appealing manner. One technique is to create a focal point by placing a larger or more vibrant flower in the center of the composition. This draws the viewer’s attention and adds interest to the artwork. Additionally, you can experiment with different color combinations to create contrast or harmony, depending on the desired effect.
Another technique to consider is the use of different heights and textures. By varying the heights of the flowers, you can add depth and dimension to the collage or mosaic. Mixing flowers with different textures, such as smooth petals or delicate blooms, can also create visual interest.
When arranging the flowers, it is helpful to lay them out on the canvas or base first before gluing them down. This allows you to experiment with different arrangements and make adjustments as needed. Once you are satisfied with the placement, you can proceed to glue the flowers onto the canvas using a suitable adhesive.
Overall, arranging the flowers is a creative process that requires careful consideration of color combinations, focal points, and textures. By exploring different techniques and tips, you can create a visually stunning flower collage or mosaic that showcases the beauty of the flowers.
Gluing the Flowers
Once the flowers are arranged, it’s time to glue them onto the canvas or base. The choice of adhesive is crucial to ensure the longevity and durability of your flower collage or mosaic. Here are some of the best adhesive options and techniques to securely attach the flowers to your project:
- Floral Adhesive: This specialized adhesive is designed specifically for attaching flowers. It provides a strong bond without damaging the delicate petals. Apply a small amount of floral adhesive to the back of each flower and press it firmly onto the canvas or base.
- Hot Glue Gun: If you prefer a quicker and more secure bonding method, a hot glue gun can be used. Be cautious while working with hot glue and ensure that you apply the glue to the base rather than directly onto the flowers to avoid any damage.
- Clear Craft Glue: Clear craft glue is another option for attaching flowers. It dries transparent, allowing the natural beauty of the flowers to shine through. Apply a thin layer of craft glue to the back of each flower and press it onto the canvas or base.
When gluing the flowers, it’s important to consider the placement and arrangement. Start by attaching the larger flowers as focal points and then fill in the gaps with smaller blooms. Experiment with different layouts until you achieve the desired look.
Remember to handle the flowers with care to prevent any damage during the gluing process. Once the flowers are securely attached, allow the adhesive to dry completely before moving or displaying your artwork. This will ensure that the flowers stay in place and maintain their vibrant colors for years to come.
Adding Finishing Touches
To enhance the overall look of your flower collage or mosaic, adding finishing touches is essential. These final details can make a significant difference in the final outcome of your artwork. By incorporating different embellishments and techniques, you can add depth, texture, and visual interest to your creation.
One way to add depth to your flower collage or mosaic is by using three-dimensional elements. Consider adding small beads, sequins, or gemstones to create a sparkling effect. These embellishments can be strategically placed to highlight certain areas of your artwork and create a focal point.
Texture can also be added to your flower collage or mosaic to give it a unique and tactile feel. You can achieve this by incorporating materials such as fabric, lace, or ribbon. Cut small pieces of these materials and glue them onto your artwork, creating a layered effect that adds visual interest.
Another technique to enhance your artwork is by incorporating different painting techniques. You can use acrylic paints to add shading and highlights to your flowers, giving them a more realistic and vibrant appearance. Experiment with different brush strokes and blending techniques to create a sense of movement and depth.
Lastly, consider using natural elements to add a touch of authenticity to your flower collage or mosaic. Dried leaves, twigs, or even small feathers can be carefully placed among the flowers to create a more natural and organic look. These elements can add a sense of realism and bring your artwork to life.
Remember, the finishing touches are what truly make your flower collage or mosaic unique and personal. Don’t be afraid to experiment and let your creativity shine through. With the right embellishments and techniques, you can transform your artwork into a stunning masterpiece.
Grouting and Sealing
If you are creating a flower mosaic, grouting and sealing are necessary steps to give your artwork a polished and professional finish. Grouting involves filling the gaps between the flowers with a special grout mixture, while sealing helps protect the mosaic from moisture and damage. Follow these step-by-step instructions to grout and seal your mosaic, ensuring its longevity and durability.
Step 1: Prepare the Grout
Start by selecting a grout color that complements your flowers and overall design. Mix the grout according to the manufacturer’s instructions, ensuring a smooth and consistent texture. Use a grout float to apply the grout mixture evenly over the entire surface of the mosaic, making sure to fill all the gaps between the flowers.
Step 2: Remove Excess Grout
After applying the grout, use a damp sponge to gently wipe away the excess grout from the surface of the flowers. Be careful not to disturb the arrangement of the flowers while cleaning. Rinse the sponge frequently to prevent the grout from smearing or staining the flowers.
Step 3: Let the Grout Dry
Allow the grout to dry completely according to the manufacturer’s instructions. This usually takes 24-48 hours. Avoid touching or moving the mosaic during this time to ensure the grout sets properly.
Step 4: Apply a Sealer
Once the grout is fully dry, apply a sealer to protect the mosaic from moisture and damage. Choose a sealer specifically designed for mosaics or crafts. Use a brush or sponge to apply the sealer evenly over the entire surface of the artwork. Allow the sealer to dry completely before handling or displaying the mosaic.
By following these step-by-step instructions, you can effectively grout and seal your flower mosaic, giving it a polished and professional finish. The grouting process fills the gaps between the flowers, while the sealing process protects the artwork from moisture and damage, ensuring its longevity and durability. Now that your mosaic is complete, you can proudly display your floral masterpiece for all to admire.
Displaying and Caring for Your Artwork
Once your flower collage or mosaic is complete, it’s time to showcase your beautiful artwork. Properly displaying and caring for your creation will ensure its longevity and allow you to enjoy it for years to come. Here are some tips to help you display and care for your artwork:
- Framing: Consider framing your flower collage or mosaic to protect it from dust, dirt, and damage. Choose a frame that complements the colors and style of your artwork.
- Hanging: When hanging your artwork, make sure to use appropriate hooks or nails that can support the weight of the piece. Consider the height and placement to create an eye-catching display.
- Preserving: To preserve the vibrant colors of your floral masterpiece, keep it away from direct sunlight and extreme temperature changes. Regularly dust the surface with a soft brush or cloth to remove any accumulated dirt or debris.
- Protective Coverings: If your flower collage or mosaic is exposed to high humidity or in a potentially risky environment, consider using a protective covering, such as glass or acrylic, to shield it from moisture and potential damage.
- Rotation: To prevent fading or discoloration, consider rotating your artwork periodically. This will ensure that all parts of the artwork receive equal exposure and prevent any one area from fading more quickly than others.
- Professional Restoration: If your artwork starts to show signs of wear or damage over time, consider consulting a professional art restorer who specializes in floral artwork. They can help repair any damage and ensure the longevity of your piece.
By following these tips, you can ensure that your flower collage or mosaic remains in excellent condition and continues to bring beauty and joy to your space. Remember to regularly clean and maintain your artwork to preserve its original splendor.
Frequently Asked Questions
- What materials do I need to create a flower collage or mosaic?
To create a flower collage or mosaic, you will need a canvas or base, dried and pressed flowers, adhesive, and optional embellishments.
- How do I choose the right flowers for my collage or mosaic?
When selecting flowers, consider their colors, shapes, and sizes. Choose flowers that complement each other and create a visually appealing composition.
- How do I dry and press flowers for my artwork?
To dry flowers, hang them upside down in a cool, dark place for about two weeks. To press flowers, place them between parchment paper and heavy books for a week.
- What are some tips for arranging the flowers?
Arrange the flowers in a visually pleasing way by considering color combinations, focal points, and creating a balanced composition.
- What type of adhesive should I use to attach the flowers?
For securely attaching the flowers, use a strong adhesive suitable for the materials you are working with, such as a craft glue or adhesive gel.
- How can I add finishing touches to my artwork?
You can enhance your flower collage or mosaic by adding embellishments like ribbons, beads, or textured elements to create depth and visual interest.
- What is the process of grouting and sealing a flower mosaic?
To give your flower mosaic a polished finish, follow the step-by-step instructions for grouting and sealing, which will ensure its durability and longevity.
- How should I display and care for my flower collage or mosaic?
Properly display your artwork by framing it or hanging it on a wall. To care for it, avoid direct sunlight and handle it with care to prevent damage.