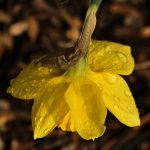

Are you interested in learning how to draw a beautiful and realistic gardenia flower using pencils? Look no further! In this step-by-step guide, we will walk you through the process of creating a stunning gardenia drawing, complete with shading and intricate details. Whether you are a beginner or an experienced artist, this tutorial will provide you with valuable tips and techniques to enhance your drawing skills.
Before we dive into the artistic process, let’s gather the necessary materials. You will need different pencil grades, ranging from light to dark, to achieve various shades and tones. Additionally, make sure to have high-quality paper that can handle the detailed work involved in drawing a gardenia. Don’t forget to have erasers on hand to correct any mistakes or make subtle adjustments to your drawing.
Now that we have our materials ready, let’s start by sketching the basic shape of the gardenia flower. Focus on capturing the overall form and proportions of the flower using light pencil strokes. This initial sketch will serve as the foundation for adding details and bringing your gardenia drawing to life.
Once you have the basic shape in place, it’s time to add intricate details and texture to your gardenia. Pay close attention to the petals, leaves, and the center of the flower. Study the intricate patterns and shapes within the gardenia and incorporate them into your drawing. This is where your observation skills and attention to detail will shine.
To make your gardenia drawing more realistic, mastering the art of shading and blending is essential. Experiment with different shading techniques to create highlights and shadows, giving your drawing depth and dimension. Play around with the pressure applied to the pencil to achieve varying degrees of darkness and lightness. Blending the shades together will create smooth transitions and add a realistic touch to your artwork.
As you refine your gardenia drawing, take the time to add final touches and make any necessary adjustments. Pay attention to areas that may need more definition or refinement. Consider how you can create a sense of depth in your artwork by strategically shading certain areas and adding highlights. This attention to detail will elevate your drawing and make it truly stand out.
Now that you have a beautifully drawn gardenia, it’s time to consider coloring options. You can choose to use colored pencils to add vibrant hues to your flower or experiment with watercolor effects for a more ethereal look. Explore different techniques to achieve the desired colors and create a visually stunning gardenia drawing.
To enhance your gardenia drawing further, think about adding a background and considering the composition. A simple gradient background can help your flower stand out, or you can create a garden setting to add context to your artwork. Pay attention to the composition of your drawing, ensuring that the elements are arranged in a visually pleasing and harmonious way.
In conclusion, drawing a gardenia with pencils is a rewarding and enjoyable artistic endeavor. By following this step-by-step guide, you will acquire the skills and techniques needed to create a realistic and stunning gardenia drawing. So grab your pencils, gather your materials, and let’s embark on this creative journey together!
Gathering Your Materials
Gathering the right materials is crucial when it comes to drawing a realistic gardenia with pencils. Here are the essential tools and materials you will need:
- Different pencil grades: To achieve different levels of darkness and shading, you will need a range of pencil grades, from 2H (lightest) to 6B (darkest). This will allow you to create depth and dimension in your drawing.
- Erasers: Having both a kneaded eraser and a vinyl eraser is important. The kneaded eraser is great for lifting graphite and creating highlights, while the vinyl eraser is useful for erasing larger areas.
- High-quality paper: Using a smooth, heavyweight paper specifically designed for drawing will ensure that your pencil strokes blend well and create a realistic texture.
By having these materials on hand, you will be well-equipped to start your gardenia drawing and achieve the desired level of detail and realism.
Sketching the Basic Shape
When starting to draw a gardenia flower, it is important to first sketch the basic shape of the flower. This will serve as the foundation for the rest of your drawing. Begin by focusing on the overall form and proportions of the gardenia. Take a close look at the reference image or real flower and observe its shape and size.
Using light pencil strokes, lightly sketch the outline of the gardenia flower on your paper. Don’t worry about making it perfect at this stage, as you can easily make adjustments later. The goal here is to capture the general shape and structure of the flower.
Pay attention to the curves and contours of the petals, as well as the size and placement of the flower’s center. Take your time and be patient with this step, as it sets the stage for the rest of your drawing.
Remember to use light pencil strokes during this initial sketching stage. This will make it easier for you to make adjustments and refine the shape of the gardenia as you progress. Once you are satisfied with the basic shape, you can move on to adding more details and bringing your gardenia drawing to life.
Adding Details and Texture
Adding details and texture is an essential step in drawing a realistic gardenia flower. It is through these intricate details that the flower comes to life on paper. When adding details to the gardenia, pay close attention to its petals, leaves, and center, as these are the key elements that define its beauty.
To create texture and depth, there are various techniques you can use. One technique is cross-hatching, which involves drawing parallel lines in different directions to create the illusion of texture. This technique is particularly effective for adding texture to the petals and leaves of the gardenia.
Another technique is stippling, which involves creating small dots or dots of varying sizes to create texture. This technique can be used to add texture to the center of the gardenia or to create a sense of depth in the overall drawing.
Additionally, you can use shading techniques to add depth and dimension to the gardenia. By carefully observing the light source and the way it interacts with the flower, you can create realistic shadows and highlights. This will make the drawing appear more three-dimensional and lifelike.
Experiment with different techniques and find the ones that work best for you. Remember to take your time and pay attention to the details. Adding intricate details and texture to your gardenia drawing will make it stand out and capture the beauty of this delicate flower.
Shading and Blending
Master the art of shading and blending to make your gardenia drawing look realistic. Explore different shading techniques to create highlights and shadows.
Shading and blending are essential techniques to bring depth and realism to your gardenia drawing. By understanding how light interacts with objects, you can create the illusion of form and volume.
One shading technique you can experiment with is hatching, which involves creating parallel lines to represent shadows and darker areas. Cross-hatching, on the other hand, involves layering intersecting lines to achieve a more textured effect.
Another technique is stippling, where you use small dots or dots of varying sizes to create texture and shading. This method can be time-consuming but produces stunning results.
When blending, you can use a blending stump or tortillon to smooth out the transitions between different shades. This technique helps create a seamless and realistic look.
Remember to observe the reference image or real gardenia closely to understand where the light is coming from and how it affects the different parts of the flower. Experiment with different shading techniques to find the one that works best for you and brings your gardenia drawing to life.
Refining and Finalizing
Refining and finalizing your drawing is an important step in creating a realistic gardenia artwork. This is where you add those final touches that bring your drawing to life and make it truly stand out. It’s also the time to address any areas that may need improvement or adjustments.
To refine your drawing, pay close attention to the details. Take a step back and analyze your artwork as a whole. Look for any areas that may need more definition or refinement. This could include adding more texture to the petals, adjusting the shading to create more depth, or refining the shape of the leaves.
Creating a sense of depth and dimension in your artwork is crucial for making it look realistic. Experiment with different shading techniques to create highlights and shadows that give your gardenia drawing a three-dimensional appearance. This could involve using cross-hatching, stippling, or blending techniques to achieve the desired effect.
Remember to take your time during this stage and be patient. It’s the small details and careful adjustments that can make a big difference in the overall quality of your artwork. Step back frequently to assess your progress and make any necessary refinements. With practice and perseverance, you’ll be able to refine and finalize your gardenia drawing to perfection.
Coloring Options
When it comes to coloring your gardenia drawing, there are various options you can explore to bring your artwork to life. Two popular techniques include using colored pencils and adding watercolor effects. Let’s dive into each option and discover techniques for achieving vibrant and realistic colors.
Colored Pencils:
Colored pencils are a versatile and accessible medium for coloring your gardenia drawing. They allow for precise control and layering of colors, enabling you to create depth and dimension in your artwork. Here are some tips for using colored pencils:
- Select a range of colors that closely match the hues of a gardenia flower. Consider shades of white, cream, yellow, and green.
- Start by lightly layering the colors, gradually building up the intensity and adding shadows and highlights.
- Use different techniques, such as hatching, cross-hatching, and blending, to create texture and depth.
- Experiment with blending tools, such as blending stumps or cotton swabs, to achieve smooth transitions between colors.
Watercolor Effects:
If you want to add a soft and ethereal look to your gardenia drawing, watercolor effects can be a great option. Here’s how you can achieve this effect:
- Start by sketching your gardenia flower using a light pencil outline.
- Wet your watercolor paper with a brush or sponge, ensuring it is evenly damp but not soaking wet.
- Apply watercolor paints in layers, starting with light washes and gradually adding more intense colors.
- Experiment with different techniques, such as wet-on-wet or wet-on-dry, to create interesting textures and blending effects.
- Allow each layer to dry before adding additional details or colors to prevent smudging.
Remember, whether you choose colored pencils or watercolor effects, practice and experimentation are key to achieving vibrant and realistic colors in your gardenia drawing. Have fun exploring different techniques and finding your own unique style!
Adding Background and Composition
Adding a background and considering the composition is an essential step in enhancing your gardenia drawing. By carefully selecting and creating a background, you can add depth and context to your artwork, making it more visually appealing. Additionally, understanding composition principles will help you arrange the elements of your drawing in a way that creates balance and harmony.
When choosing a background for your gardenia drawing, you have several options to consider. One option is to create a simple gradient background, where you blend two or more colors together to create a smooth transition. This can provide a clean and minimalistic look, allowing the focus to remain on the gardenia flower itself.
Another option is to depict a garden setting as the background, which can add a sense of realism and context to your drawing. You can include elements such as trees, grass, or other flowers to create a more immersive scene. Consider the lighting and perspective to make the background complement your gardenia drawing.
If you want to add texture to your background, you can experiment with different techniques such as using a textured surface or incorporating patterns. This can add visual interest and create a unique backdrop for your gardenia flower.
When it comes to composition, it’s important to consider the placement and arrangement of the elements in your drawing. Aim for a balanced composition by distributing visual weight evenly across the artwork. You can achieve this by placing the gardenia flower off-center and balancing it with other elements or negative space.
Think about the rule of thirds, where you divide your drawing into a grid of nine equal parts and place important elements along the lines or at the intersections. This can create a more dynamic and visually pleasing composition.
By adding a background and paying attention to composition, you can elevate your gardenia drawing to a new level of artistry. Take the time to experiment and find the perfect combination that enhances the beauty of your artwork.
Choosing a Background
When it comes to choosing a background for your gardenia drawing, you have a variety of options to consider. Each background choice can greatly impact the overall look and feel of your artwork. Here are a few options to explore:
- Simple Gradient: One option is to create a simple gradient background, where you blend two or more colors together. This can create a soft and subtle backdrop that allows the gardenia to take center stage.
- Garden Setting: Another option is to place your gardenia drawing within a garden setting. This could include elements such as grass, trees, or other flowers. It can add a sense of realism and context to your artwork.
- Textured Surface: Consider drawing your gardenia on a textured surface, such as a piece of textured paper or a canvas. This can add depth and visual interest to your drawing, enhancing the overall composition.
Ultimately, the background you choose should complement and enhance your gardenia drawing. Take some time to experiment with different options and see which one best suits your artistic vision. Remember, the background should not overpower the main subject, but rather create a harmonious balance within the artwork.
Composition and Placement
Composition and Placement
When it comes to creating a visually pleasing and harmonious artwork of a gardenia, composition and placement play a crucial role. The way you arrange the elements of your drawing can greatly impact the overall impact and appeal of the final piece. Here are some key points to keep in mind:
- Balance: Achieving balance in your composition is essential. Consider the placement of the gardenia flower, leaves, and any additional elements you may have included. Distribute the visual weight evenly to create a sense of equilibrium.
- Rule of Thirds: The rule of thirds is a popular compositional guideline. Imagine dividing your drawing into a grid of nine equal sections using two horizontal and two vertical lines. Place the focal point or main elements of your gardenia drawing along these lines or at their intersections.
- Leading Lines: Utilize leading lines to guide the viewer’s eye through your artwork. These lines can be created by the stem, leaves, or petals of the gardenia. They help create a sense of movement and flow within the composition.
By paying attention to composition and placement, you can create a gardenia drawing that is visually pleasing and captures the essence of this beautiful flower. Experiment with different arrangements and find the one that best conveys your artistic vision.
Frequently Asked Questions
- Q: What materials do I need for drawing a gardenia with pencils?
- Q: How do I sketch the basic shape of a gardenia flower?
- Q: How can I add details and texture to my gardenia drawing?
- Q: What are some shading and blending techniques I can use?
- Q: How do I refine and finalize my gardenia drawing?
- Q: Can I use colored pencils or watercolor effects for my gardenia drawing?
- Q: How can I enhance my gardenia drawing with a background?
- Q: What should I consider when arranging the elements of my gardenia drawing?
A: To draw a gardenia with pencils, you will need different pencil grades (such as HB, 2B, and 4B), erasers (both kneaded and vinyl erasers), and high-quality paper specifically designed for drawing.
A: Start by lightly sketching the overall form and proportions of the gardenia flower using pencil strokes. Focus on capturing its basic shape and structure, allowing for easy adjustments as needed.
A: To add intricate details to your gardenia drawing, pay attention to the petals, leaves, and center of the flower. Use various shading techniques, hatching, and cross-hatching to create texture and depth.
A: To make your gardenia drawing look realistic, practice shading and blending techniques. Experiment with creating highlights and shadows using different pencil pressures, blending stumps, and even your fingers.
A: Once you have added all the necessary details, take the time to refine your drawing. Make any necessary adjustments and add final touches to create a sense of depth and dimension in your artwork.
A: Yes, you can explore different coloring options for your gardenia drawing. Consider using colored pencils to add vibrant hues or experiment with watercolor effects to achieve a more painterly look.
A: Adding a background can enhance your gardenia drawing. Choose a simple gradient, a garden setting, or a textured surface to complement the flower and create a visually appealing composition.
A: Composition is important in creating a visually pleasing artwork. Consider the placement of the flower, leaves, and other elements to achieve balance, harmony, and a strong focal point in your drawing.